|


|
Christmas Gathering 2002
Brief Recap: Last turn, the Broken Wind was attacked by Wyvern Riders sent by Thae-Rune Ibn. Following is a summary of the face-to-face gaming session held at Micah's house on December 23 and 25th, 2002. Wyvern Riding Works! Ghotu saw the wyverns coming first, and gave the alarm, which brought the rest of the party and the sailors on deck. Humphrey cast a Whirlwind that took out one Wyvern, then Invisibility and Haste on the group, and everyone took position to fight the oncoming Gith. The Gith mindblasted the ship, stunning Bardock and some of the sailors, but were subsequently slaughtered in only two passes over the ship, suffering javelins, bolts and arrows from Hasted Ghotu Fyona and Bibi. Bronk skewered one with a harpoon, dragging it into the sea. Blade leapt onto one of the wyvern from the crow's nest and killed the rider, but could not take control of the wyvern, which stung him repeatedly. Blade finally succumbed to the poison but was saved in mid air by Bibi and her Winged Shoes. Still, Blade was convinced that wyvern riding works. Humphrey also dispatched some stragglers with his Wand of Fireball. Bronk made a helmet out of the wyvern's skull he harpooned, which he wore throughout the rest of the adventure, affixing a crown to it later (see below). Mog did nothing. The Barrow Isle The party discovered three entrances to the Tomb of Horrors, and their Wand of Trap Detection saved them from the trapped false tombs. Bronk, armed with the Wand, led the party into the real tomb.
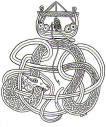
They saw a frescoed and plastered hall with bright paintings similar to Egyptian or Greek art, seen above. At the end of the hall was a portal of mist, which Bronk lost his Halberd through, as well as a green face with open mouth (seen below).
Humphrey retrieved Bronk's halberd with an elemental and a Wizard Eye spell. The party also discovered writing on the floor, which hinted at a secret door. Humphrey caused his elemental to smash several pits in search of it, and the party finally found the passage. They killed a four armed gargoyle and made their way down a wide passage to another secret passage (explored by Bibi in bat form) which led to the Chapel of Evil.
The party carefully made their way down the isle between pews, seeing an alter before them and another portal of mist to their right (to which the skeleton in the picture points). The alter was made of opalescent blue material that grew with an inner light. Humphrey touched the alter and a Lightning Bolt rewarded his curiosity. So the party decided to try the portal. And there it was that no less than three party members had their sex and alignment changed. Blade was even tempted to stay female, as it would throw off pursuit for his past wrongs in several jurisdictions. In the end everyone was changed back, though Bardock lost all his clothes in the process (only to find it later in the lich's lair). Bibi and Blade also got naked. The party left the Chapel of Evil, some with a new perspective on life, by way of a coin operated secret door. They traveled down a couple of flights of stairs into a passage with fear gas. Bibi changed into her panther form but was quickly webbed and calmed. The passage led to to a False Crypt, where Ghotu used a glowing mace to slay a "lich" which was actually a zombie and a complex Programmed Illusion. Bibi used one of her stones and tripped the Illusion early, before the party had killed the zombie, spoiling the effect and revealing the Illusion. They found a jade coffer and a gold couch, which Bronk mutilated. Bronk also found here a gold crown which he stuck atop his new wyvern skull helm--for special or ceremonial occasions, he explained to the others.
Ghotu found another secret door which led the party to an embalming and mummy preparation room. (Note that a required key was hidden in this room, which the party passed up but later made the Efreet retrieve.) Eventually the delvers made their way into a misty room with beautiful and good aligned siren who had been imprisoned there by Acererak. Her curse was that she could not explain her bondage and would only be freed if someone asked her to accompany them out of the tomb. The adventurers decided to forego such parlay and took her out, claiming her Bag of Holding as booty. After exploring more dead ends, the delvers discovered another secret passage taking them to an adamantite door. Fyona discovered three slots in the door, and together with Blade they used the slots to open the door by shoving in three swords. This led them to a hall of pillars with a throne, two more green faces, and some doors. Humphrey investigated the throne and found another crown and a scepter, which he took and stowed in his robes. The party then investigated the doors, finding one leading to an empty room, a second leading to a room with flying swords and shields, the third leading to a mummy in a sarcophagus. After vanquishing the mummy, the party again looked to the throne which Humphrey Knocked to reveal a secret passage. This led to stairs upon which was a key, which the party took. This passage led to the Valves of Mithril, two great mithril doors 14' wide and 28' tall. Humphrey inserted the key into the doors, and was shocked. He then discovered a depression in the door which fit the ends of the scepter he had recently found. Humphrey inserted the gold end of the scepter and the doors opened. He wondered what the silver end would have done... The party entered a False Treasure Room with four statues and a bronze urn with smoke coming out the top. Humphrey opened the urn's seal and an Efreet came out, thanking the party and offering three services. Humphrey first asked where the Obsidian Stone was, and the Efreet had no knowledge of this. Humphrey then asked where the crypt was, and the Efteet took the party to a hidden door which required a key. Humphrey made the Efreet retrieve the key, which he did in short order from the embalming room. After much debate, Humphrey was convinced by Ghotu and the others to give the Efteet its final wish, freeing it from bondage. The creature left, to return later. The party entered the crypt only to find a domed ceiling and yet another keyhole, this one in the floor. Humphrey inserted one of the keys into the hole and turned it three times, causing the floor to peak beneath the party's feet. Everyone but Blade and Bibi moved off the peaked floor. The floor suddenly shot toward the ceiling as the crypt rose from the ground. Bibi narrowly escaped being crushed; Blade did not. But as the party mourned their fallen comrade, the Efreet returned and breathed life back into Blade. Humphrey asked why the Efreet had done this, and he replied, "your generosity, of course." He then disappeared for good (?). Entering the crypt, the adventurers saw a pile of treasure and a skull. Amid the treasure wwere three coffers. Bibi used one of her stones, and the stone, linked to the Obsidian Stone by the magic of the Druids, revealed the dark object of the quest, causing one of the coffers to open. Humphrey immediately took advantage of Bibi's magic, snatching the stone with his telekinesis.
The fight was quick. Eclavdra stunned several of the party members with an Unholy Word, but was cut to pieces before she could act further. Bibi then confronted Humphrey, demanding that someone other than the secretive mage carry the stone. Humphrey flatly refused, claiming it was safest with him. When Bibi tried to use another of her stones, Humphrey Teleported away, leaving the party in the crypt. Trapped by the adamantite door which closed behind them earlier, the party had to search for another exit. Eventually they made their way out of the Tomb of Horrors. About the time they exited the Tomb, Humphrey returned, saying that the stone was now safe. The party then headed for the ship, tired, with a long journey before them. And so ended the Gathering...

 HOME
HOME


|
||||||||||||||||||||||||||||||||||||||||||


 Before anyone else could act, a being manifested itself in the room--Eclavdra, High Priestess of the Dark Queen, now made a lich by the power of Thae-Rune Ibn.
![]()